If you prefer a video over text, click here.
Building an audio player has become fairly simple after HTML5. The <audio> tag is supported by most modern browsers (IE too!) and has all the basic features required for an audio player. It supports looping, autoplay, mute, enable/disable controls, etc. It also emits helpful events like play, pause, end, seek, etc.
But if you want to build something more advanced like an audio editor, the audio tag isn’t sufficient. But worry not, wavesurfer to the rescue!
Wavesurfer is a JavaScript library that uses Web Audio API and HTML5 canvas to display and play audio files. Audio files can be loaded from a remote URL or locally. Today, I will share how I built an advanced audio player using WavesurferJS in NextJS.
This is what we will be building today.

Additionally, I will also show how to use the regions plugin with wavesurfer. The regions plugin allows the user to create regions on the waveform of the audio by clicking and dragging.

Let’s start!
Install
First, let’s install wavesurfer from npm
npm i wavesurfer.js
Alternatively, it can be loaded from a CDN using a script tag like this,
<script src="https://unpkg.com/wavesurfer.js"></script>
Waveform Component
import Wavesurfer from "wavesurfer.js";
import { useEffect, useRef } from "react";
import { Flex, Button } from "@chakar-ui/react";
const Waveform = ({ url }) => {
  const waveform = useRef(null);
  useEffect(() => {
    // Check if wavesurfer object is already created.
    if (!waveform.current) {
      // Create a wavesurfer object
      // More info about options here https://wavesurfer-js.org/docs/options.html
      waveform.current = Wavesurfer.create({
        container: "#waveform",
        waveColor: "#567FFF",
        barGap: 2,
        barWidth: 3,
        barRadius: 3,
        cursorWidth: 3,
        cursorColor: "#567FFF",
      });
      // Load audio from a remote url.
      waveform.current.load(url);
      /* To load a local audio file
		    1. Read the audio file as a array buffer.
			2. Create a blob from the array buffer
			3. Load the audio using wavesurfer's loadBlob API
	 */
    }
  }, []);
  const playAudio = () => {
    // Check if the audio is already playing
    if (waveform.current.isPlaying()) {
      waveform.current.pause();
    } else {
      waveform.current.play();
    }
  };
  return (
    <Flex flexDirection="column" w="100%">
      <div id="waveform" />
      <Flex flexDirection="row" justifyContent="center">
        <Button m="4" onClick={playAudio}>
          Play / Pause
        </Button>
      </Flex>
    </Flex>
  );
};
export default Waveform;
There is a lot going on here, so let me break it down.
There are 2 UI elements here,
- A
div#waveformdiv which the wavesurfer library uses to create a canvas and show the waveform. - A button from the ChakraUI library that allows playing and pausing the audio.
When the component is mounted, the useEffect hook is called. The Wavesurfer.create function creates a wavesurfer object. This object is crucial to perform actions like loading the audio file, playing/pausing audio, stopping audio, etc. It is also useful for listening to events emitted by wavesurfer.
Since we don’t want to create a new instance on every render of the component we use the useRef hook to maintain a single instance of wavesurfer across multiple renders of the component.
When the button is clicked the playAudio function is called which either pauses or plays the audio.
Adding the Regions plugin
import Wavesurfer from "wavesurfer.js";
import { Button, Flex } from "@chakra-ui/react";
import { useEffect, useRef } from "react";
import * as WaveformRegionsPlugin from "wavesurfer.js/dist/plugin/wavesurfer.regions";
import randomColor from "randomcolor";
const Waveform = ({ url }) => {
  const waveform = useRef(null);
  useEffect(() => {
    if (!waveform.current) {
      waveform.current = Wavesurfer.create({
        container: "#waveform",
        waveColor: "#567FFF",
        barGap: 2,
        barWidth: 3,
        barRadius: 3,
        cursorWidth: 3,
        cursorColor: "#567FFF",
		// Add the regions plugin.
	    // More info here https://wavesurfer-js.org/plugins/regions.html
        plugins: [WaveformRegionsPlugin.create({ maxLength: 90 })],
      });
      waveform.current.load(url);
	=========== ADDED =========
      // Enable dragging on the audio waveform
      waveform.current.enableDragSelection({
          maxLength: 90,
          });
      // Perform action when new region is created
          waveform.current.on("region-created", (e) => {
          let color = randomColor({
              luminosity: "light",
              alpha: 0.3,
              format: "rgba",
          });
          e.color = color;
          });
    }
    =========== ADDED =========
  }, []);
   ========== ADDED ===========
  // delete a particular region
  const deleteClip = (clipid) => {
    waveform.current.regions.list[clipid].remove();
  };
  // play a particular region
  const playClip = (clipid) => {
    waveform.current.regions.list[clipid].play();
  };
  ========== ADDED ===========
  const playAudio = () => {
    if (waveform.current.isPlaying()) {
      waveform.current.pause();
    } else {
      waveform.current.play();
    }
  };
  return (
    <Flex flexDirection="column" w="100%">
      <div id="waveform" />
      <Flex flexDirection="row" justifyContent="center">
        <Button m="4" onClick={playAudio}>
          Play / Pause
        </Button>
      </Flex>
    </Flex>
  );
};
export default Waveform;
The regions plugin is shipped with the wavesurfer npm package so it can be imported into our component without any additional steps. We add the regions plugin to the plugins array in create options. To enable the users to create regions by dragging on the audio waveform we need to enable dragging first. Regions are created with the same color. In order to differentiate between multiple regions, we listen to the region-created event. A random color is generated using the randomColor package and then set to the region by manipulating the color property.
Finally, to play or delete a region, we have 2 methods deleteClip and playClip . Both of them take clipId as an argument. When a region is created wavesurfer maintains a list of all the regions in an object. The key is a unique id that corresponds to a region. The id is generated and maintained by wavesurfer. This generated id is passed as an argument to the 2 functions.

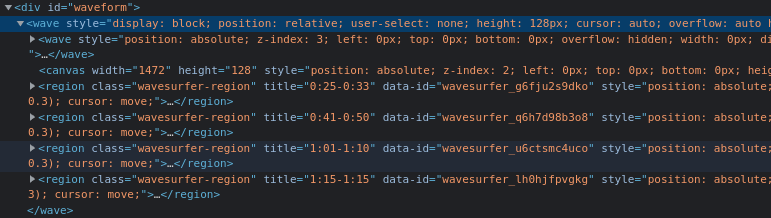
Region id is available as a data-id attribute
More information on regions can be found here https://wavesurfer-js.org/plugins/regions.html
One last but important thing, since NextJS renders components on the server and wavesurfer is a client-side library, you will end up with errors. So be sure that the component is configured with ssr value as false.
const Waveform = dynamic(() => import("./Waveform"), { ssr: false });
That’s it!
If you liked this blog post you might also like,
👉 Writing a useState hook from scratch
I am on twitter as rahulnpadalkar. I sometimes post memes and hot takes there.
I also make Youtube videos.
Some of my most watched videos.
🔗 Event Delegation in Javascript