DigitalOcean Spaces is S3-compatible object storage. S3 compatible meaning, it supports the aws-s3-sdk. At least for the most part. This guide will help you set up and configure a DigitalOcean Space for the development environment.
If you prefer a video over text, here’s a video that demonstrates the whole process.
Creating a Space.
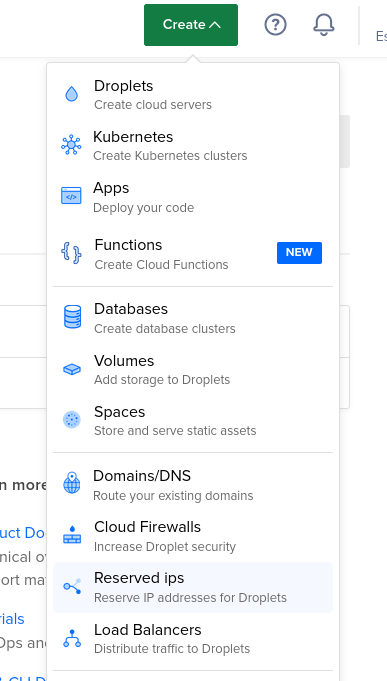
- Head over to the DigitalOcean project page and click on the green Create button on the top bar.
- From the drop-down list select Spaces

Setting up a Space
Selecting a region
- Select a region from the available list. I like to choose the one which is located closer to me.
CDN
- Enable CDN by clicking on the Enable CDN button. This will help deliver content much faster to the end-user irrespective of their location. If you updated something on the origin server, you can purge the cache from the CDN to force an update for the new copy.
Private or Public Listing
- You can restrict file listing, meaning only authorized users would be able to list and get info about the space.
- An important thing to remember, this setting doesn’t affect the visibility of individual files. Their visibility can be changed from the dashboard of the space.

Select a name
- Enter a name for your space. The name should be unique across all spaces hosted by DigitalOcean. So make sure you name your space accordingly. I personally prefer naming my space like this
{name-of-project}-{what-will-it-hold}-uploads - For example, if I am uploading say music cover-art, I would name my space
awesome-project-coverart-uploads
Hit Create!
Configuring a Space
Once the space is created successfully, it will show up under the resources tab in the project dashboard.

- To configure a Space, click on the space and head over to the Settings tab. The Settings tab allows you to edit most of the options that we available while creating the space. The most important one to get the space working is the CORS Configurations setting.
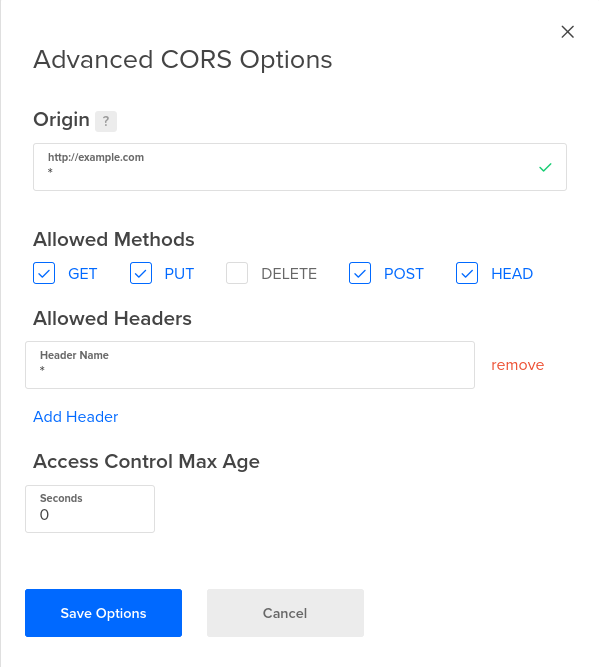
- To set up cors correctly for the development environment, click on the Add button.
- Fill up the values as shown in the image below.
- Hit Save Options.

A few things to observe,
- The origin value needs to be a wild card.
localhostdoesn’t seem to work. In production, replace the wildcard with the actual domain name. - You need to add a wildcard header in the Allowed Headers section. If not present, all requests would throw a CORS error.
That’s it! You are now ready to upload and read files from the space!
More posts you might be interested in 👇